Last Updated on 22/01/2022 by Krishna
Today we will create NSR account for freshers. All major companies in India ask for NSR IT PIN. NSR IT PIN is mandatory to join any good corporate industry in India. Although It is mostly used by the IT, BPO, and Finance sectors. NSR helps them in the authorization of candidate details. We can easily create an NSR account. It hardly takes 15 to 20 minutes to create an account in NSR. So, first of all, let’s talk about NSR. And after that, we will see how to create an NSR account?
What is NSR?
NSR stands for National Skills Registry. It was initiated by NASSCOM (National Association of Software and Service Companies). The motive behind NSR is to verify the details of the candidate. The industry authority can access the details of registered persons for authorization purposes. Details like personal information, professional information, academic information, etc. It helps them to track your journey in the industry. NSR IT pin consists of 12 digits. For your understanding, you can consider NSR as an Aadhar card for the industry. When you join a new company, the first job of the company is to verify the details of the candidate. And If the company traditionally does it, it will only take time. Here NSR plays an important role to verify the details of the candidate.
What are the documents required for NSR?
To create an NSR account successfully, we need some documents.
- Aadhar Card.
- Pan Card.
How to create NSR account?
We can create NSR account by ourselves. Follow the below steps. These steps may seem long, but believe me, if you follow every step, you will be able to create your account successfully. We can shorten the steps, but for your convenience, we break down the steps so that you can understand them more easily.
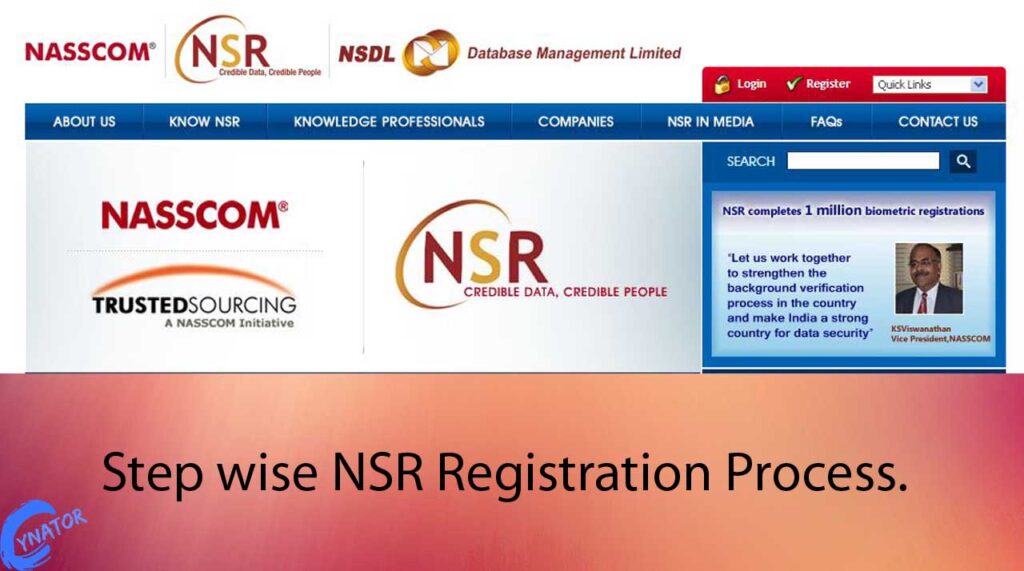
- Open NSR website.
- On the top right side, you can see the register. Now click on it.

- After the click, a confirmation page will appear. Now go down and check that I agree and click on submit.

Basic Details:
- Here you have to fill in some basic details. If you are working then choose the first one that is my present employer.
- First, choose the company, and then after that, fill in your employee ID.
- If you are not working anywhere. And you just got the offer letter from a company, in that case, choose the second one that is my future employer. Select the company. And fill in the reference number, offer id or job id. You can fill anyone of them. And you can find the reference number, offer id, or job id on your offer letter.
- And if you are not working, and you don’t even have an offer letter. But still, you want to create an account, then choose the third one that is registering at my own.

- After this, there are some basic personal details you need to fill in like Mother name, father name, address, etc. Fill in all the details. And move to the next section, which is other personal information.
- In this section first thing is to verify the mobile number. Enter the mobile number and click on send OTP. Enter the OTP that you received on your mobile and click on verify. It will verify your mobile number.
- The Second thing is to verify email. Enter your email address and click on verify. It will send and link to your mail. Now open your mail and click on that link.
- If you have a passport, fill in the passport details. Otherwise, leave it blank.
- Now fill in the PAN number. It is compulsory to fill out the PAN.

Create login ID and Password
- In the next section, it will ask you to create a login ID and password. Enter a login id and make a password for login.

- The last thing is word verification. Enter the character shown in the picture, and click Save and Continue. The first page is now complete.

- On the second page, you can see your acknowledgment number at the top center of the page.

(If you close your registration page after getting the acknowledgment number, then it will send you a mail. The mail consists of your acknowledgment number and a link. You can use that link to complete your registration.)
- Here fill in the academic details. And click on save and continue.
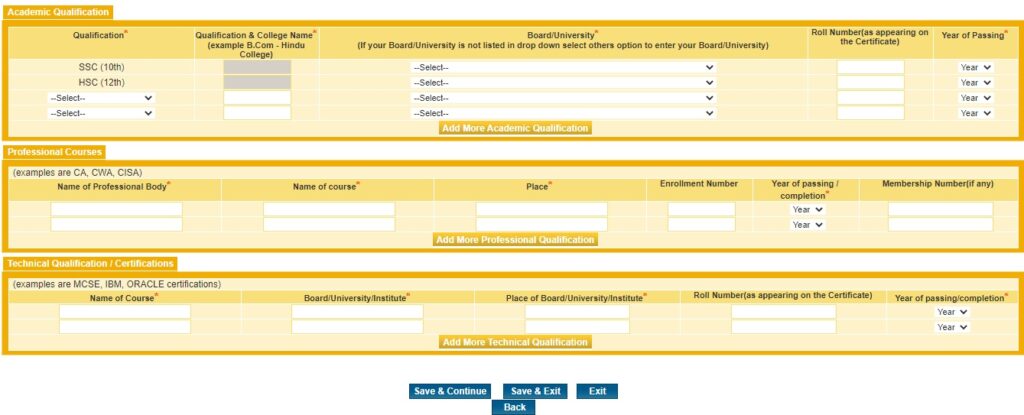
- On the next page select, the presently employed yes if you are already working in a company and fill in the details. Otherwise, select No and click on submit and view.

- After that, it will show you the preview of your form. Check all the details very carefully. If anything is wrong, then click on modify, and correct those details. Otherwise, click on authenticate yourself and make payment.

- There are two ways to authenticate yourself, that is Aadhar Card KYC or Video KYC.
- I would suggest you go through your Aadhar card. And click on ‘click here‘ at step1. It will redirect you to the Aadhar card website.
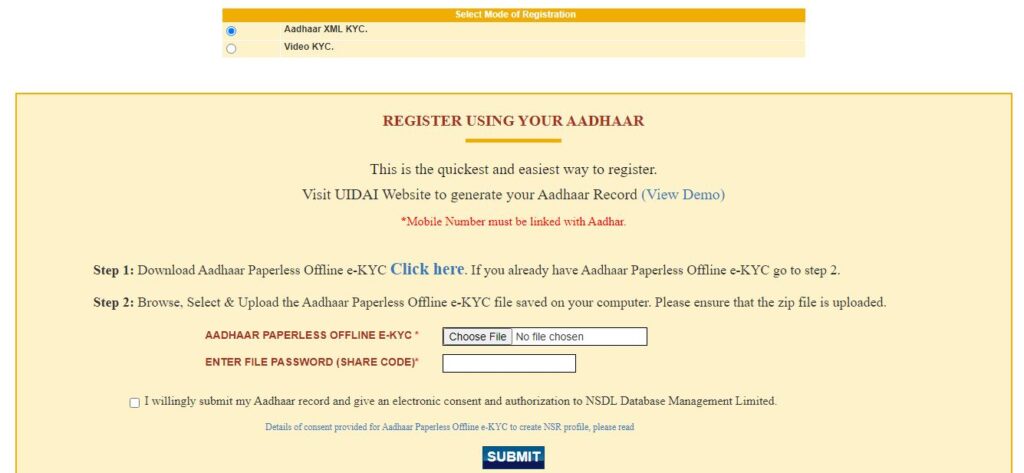
Aadhar Card KYC Process
- On the Aadhar card website, enter your Aadhar card number and security code that is given there on the image and click on send OTP.

- Choose a four digits password and enter your OTP. And click on download.

- Now upload that file and enter four digits password, tick the check box. and click on submit.
- Here you have to upload your PAN card image and your profile image. Upload it and click on proceed for payment.
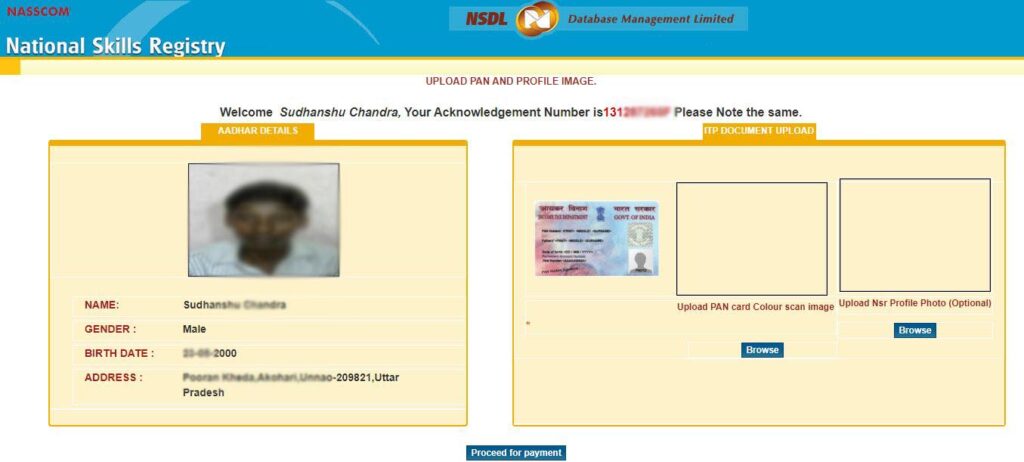
NSR validity Plan and Payment Process
- Finally, we come to the last part of this process. Now choose a plan for your NSR card, whichever you want according to your need. Click on select.
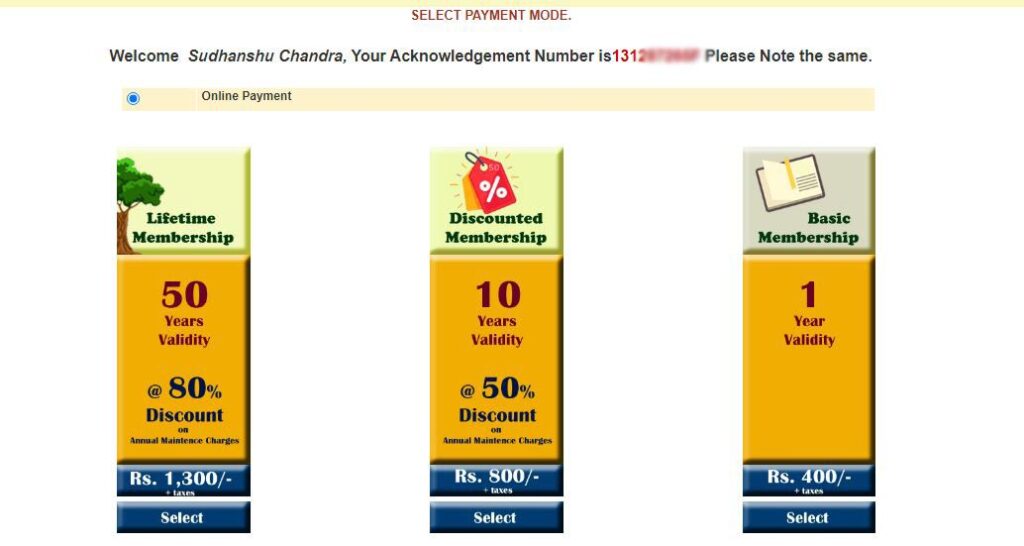
Note: The price of the plan may change in the future.
- It will show you the details of the payment. Now click on Pay.

- Choose a payment method and click on ok. In the first option, you can pay through Net Banking, Credit Card, UPI, and Wallet. I would recommend you this, but you can choose anyone.

- Now enter the details for payment. If you are paying through UPI, then enter your UPI and pay. It will send a request to that UPI for payment. And if you are paying through credit or debit cards, then enter card details, and it will send an OTP. Enter the OTP and pay.

- After successful payment, a message will appear that your registration completed successfully.

- Registration is complete, so relax and wait for the mail. NSR will send your IT pin through the mail.
Some frequently asked questions about NSR.
How many days will it take to receive the NSR IT PIN?
Generally, it will generate an IT pin within one week. So, If it is not generated within a week, you can send a mail to nsr@nsdl.co.in and send along your acknowledgment number too.
How can I generate my NSR IT pin?
You can generate your virtual IT pin from your profile. Just follow the steps given below.
- Login to your NSR account.
- Go to ‘request for’ in the menu.

- Click on generate NSR ecard.
- Now you can download it.
Can we change NSR details?
Yes, we can change some details of NSR.
Can we change the photo in NSR?
Yes, we can change.
How to login into NSR account?
There are many different methods available for login.
- First one is Login by using Username and password.
- Second one is Login by Mobile number.
- Third one is Login by Pan Card.
- Fourth one is Login by IT pin.
For more questions or clarification, please visit the official FAQ page of NSR. It will help you more.



I got this site from my pal who informed me on the topic of
this site and now this time I am visiting this website and reading very informative posts at this time.
I visited many web pages except the audio quality for audio songs current at this website is truly wonderful.